
Menu Bar Options
All admins, sub-admins and regular user (not Calendar View Only) will have the following options in the top right-hand side of their eSPACE account.
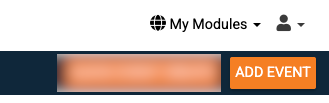
My Modules
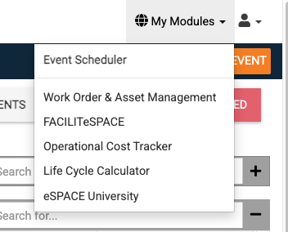
When you click on the drop-down menu, you will see the following (see below).
You will see each module (Event Scheduler and/or Work Order Management) here that you have subscribed to and can toggle between them. Please contact support to se if the Life Cycle Calculator or the Operational Cost Track ect are available in your subscription tier.
Personal Account Information
This menu provides all of your personal account information, etc.
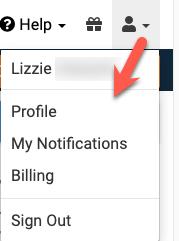
- Your user name
- Profile - Within your profile, you can do the following:
-
- Change or update your Name
- Update or change your e-mail address
- Add or edit or update your password and confirm
- Select your default calendar view, then when you click on the calendar icon in the left side menu bar, it will take you straight there
- Choose to setup and teardown times on the calendar for your account
- Choose to make all your events default to be public or not (public ones will display on your website if you are using the Public Calendar feature under advanced settings)
- If your subscription tier includes access to our API's, at the very bottom of your profile page, you can expand API Keys in order to create one and then follow the steps to start using our API's. Please read more in the article about API keys.
4. My Notifications - Each user has the ability to manage their own notifications. To adjust your notification from eSPACE navigate to your profile icon > My Notification > Notification preferences.
5. Billing - If you are a billing contact, you can go here to Manage Your Subscription and/or view History (transaction history).
6. Sign Out - Click here to sign out of the system.
On the top black band of the Dashboard page, there are 2 options:
- Search - You can quickly search here for any event by the key words in the event name or Event ID.
- Adding an event
- Quick Event Create allows you to skip some detailed options that are available in the Add Event option and helps you add last-minute/simple events to the calendar quickly.
- Add Event allows you to see all the options for editing an event including things like the Setup tab where you can add notes to spaces, resources and services chosen on the event or fill out internal forms that are attached to spaces, sources and services.
Help - Chat Bot
In the bottom left side of your left side menu bar is where you can access the Help Chat bot.

Once you click Help, you will see a pop up menu with the options to ask to search for a Knowledge base article on the topic you need help with, ask to contact support, or 3. go to your customer ticket portal so see the statuses of the tickets that you've submitted.
- Click the back arrow at the top to return to the previous page in the chat bot window.

- Once you search for a Knowledge Base article, you will see three results.

- You can click on any article in the results and then click the "view in new window" icon to be taken to the entire Knowledge Base.


- In the Knowledge Base, you will see the different sections of articles in the left and the search bar at the top.

