
eSPACE HVAC Integration can integrate with and push schedules to any of the Pelican thermostat models (not sensors, Pm5/lighting control, Gateway ect. but any thermostat)
Prerequisites: You must complete the following before setting up your thermostats in eSPACE:
- Thermostats must be physically installed and connected to the internet. See the listed of thermostats that are compatible with this integration at the bottom of the article.
-
All of your stats should be online and connected to Pelican gateways. You will need to
make sure you go through the “New Site Setup” after installing your thermostats.
- COOLSPACE must be added to your eSPACE subscription (we suggest scheduling a demo before this step) as well as Event Scheduler since approved events from Event Scheduler are what schedule the thermostats through COOLSPACE (sub-module of FACILITeSPACE).
- You must contact support@smartchurchsolutions.com after you add COOLSPACE to your eSPACE subscription and have them configure your FACILITeSPACE account for Pelican Wireless specifically.
- Your thermostats need to NOT be in vacation mode in order to be scheduled by eSPACE through the API, according to Pelican Wireless.
- It is also your responsibility to confirm and agree to any additional pricing that Pelican may include for their role in this integration.
DISCOVERING & MAPPING THERMOSTATS in FACILITeSPACE
After completing the requirements above, log into your eSPACE account, click on “My Module”, select FACILITeSPACE and follow the steps below. You must be an admin level user in Event Scheduler in order to do this.
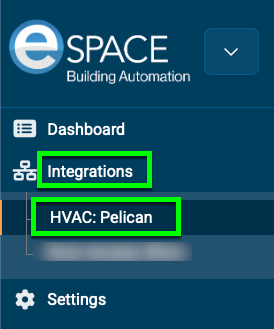
1. Log into your eSPACE account, navigate to the FACILITeSPACE module, and expand Integrations and then select Pelican.
Credentials
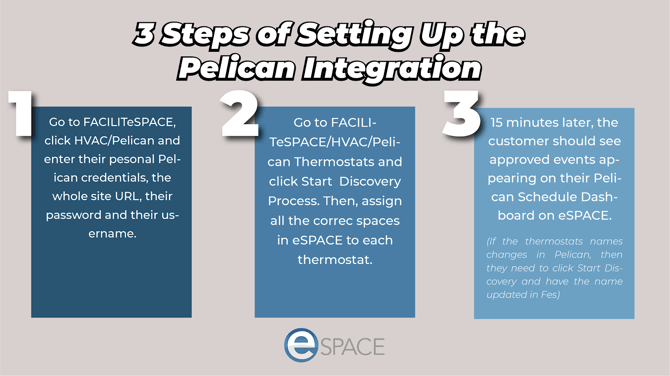
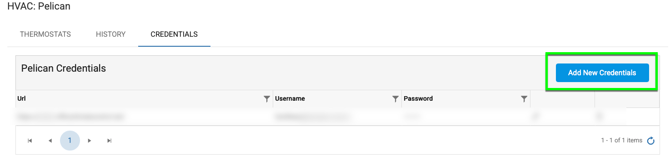
2. Click on the Credentials tab and then click “Add New Credentials” on the right-hand side. You will need to enter in the whole URL for your Pelican Wireless Thermostat account, along with a username and password to an admin-level Pelican user account.
3. In the pop up box, type in the whole URL for your Pelican site (“https://sitename”.officeclimatecontrol.net/ ), a password and username of an admin level Pelican user.
- This can be yours or another admin account you set up for the integration.
- If you use your login and reset your password down the road, make sure to also update your password in your FACILITeSPACE account otherwise, eSPACE will NO longer be able to schedule your thermostats.
-
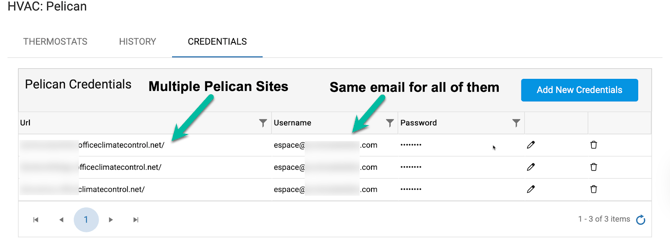
Pelican has set up their system to allow one password per email address.
- Therefore, if you use the same email address to log into multiple Pelican sites, you will also use the same password to log into those sites. This also means that while you may enter multiple URL's (one for each of your Pelican sites), you will enter in the same password when using the same email address.
-
Updating Credentials
-
If the password for the Pelican site that eSPACE has is no longer valid, then the integration will stop working.
-
If an admin has toggled on the integration notification email alert under their profile icon > My Notifications > Notification Preferences, then that admin will get an email letting them know the next time the integration tries to sync but can not due to the password no longer being valid.
-
Syncing Thermostats & Global Set Points
4. After saving your credentials, switch to the Thermostats tab and then select "Global Settings".
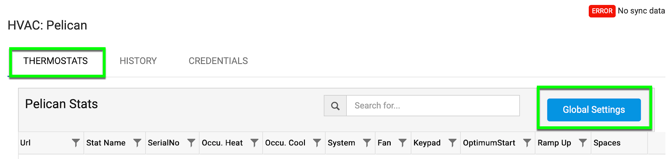
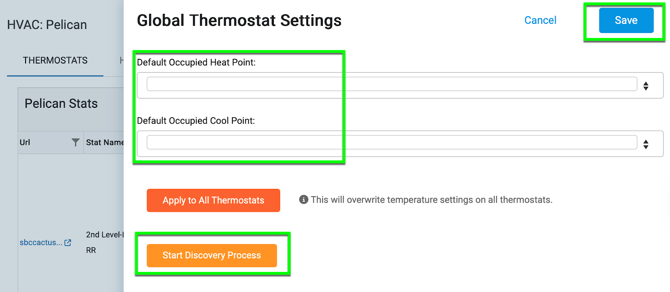
Next, choose "Start Discovery Process" to have eSPACE reach out to your Pelican site(s) and sync in all the connected thermostats.
In the same side menu, you can also choose a global occupied cooling and heating set pointthat will be applied to all your Pelican thermostats. Whenever you enter in set points, make sure to click Save!
Assigning Spaces
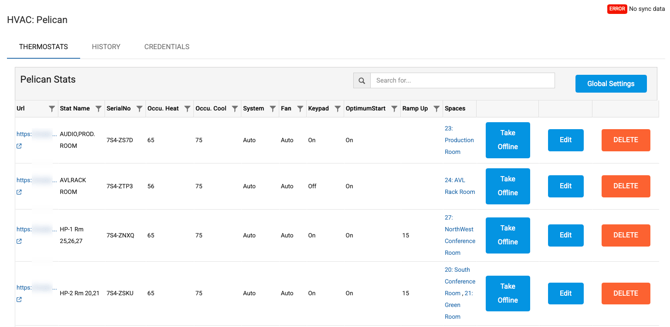
5. Once they load in, click “Edit Spaces” for each thermostat and assign spaces in eSPACE that need to be assigned to that Pelican thermostat. If one thermostat serves more than one space, make sure all the correct spaces are assigned to that same thermostat.

The end result should look like this:
Occupied Setpoints Per Thermostat
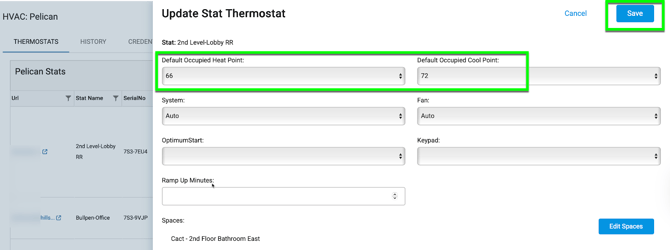
6. You can set individual occupied heating and cooling set points for individual thermostats that will then ignore the global set point. This is helpful for spaces such as auditoriums, gyms, and sanctuaries that may need a lower occupied heating and cooling set point than the other thermostats in the building.
Click “Edit” to set an occupied cooling and heating set point for a particular thermostat. Once you do, a menu will slide out from the right side where you can enter the set points for that thermostat, along with setting a mode, fan mode, and keypad accessibility.
Ramp Up Time
7. In that same menu is where you can program “Ramp up Minutes”, so that the thermostat will get a schedule that programs it to turn on X minutes before the set up & start time of the event.
- It is highly encouraged to enter ramp up minutes for each thermostat so that your thermostats start cooling or heating before the setup time and/or event start time.

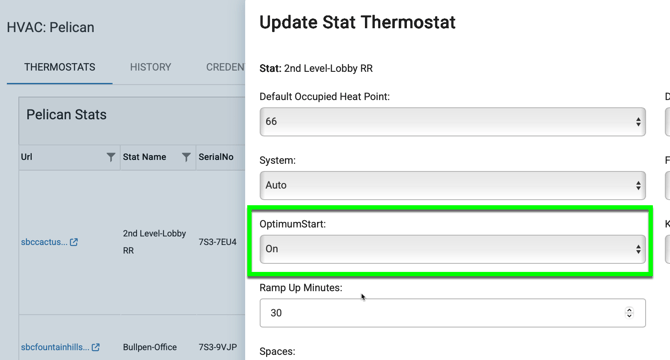
Optimum Start
This is a specific Pelican setting that they allow us to push through the API, which calculates its own ramp time based on the average time that the thermostat has taken to get back to its heating or cooling set point for an event over the last 7 days. However, we highly advise that all custoemr add at least 30 min of ramp time even with optimum start enabled.
Viewing eSPACE Events in Pelican
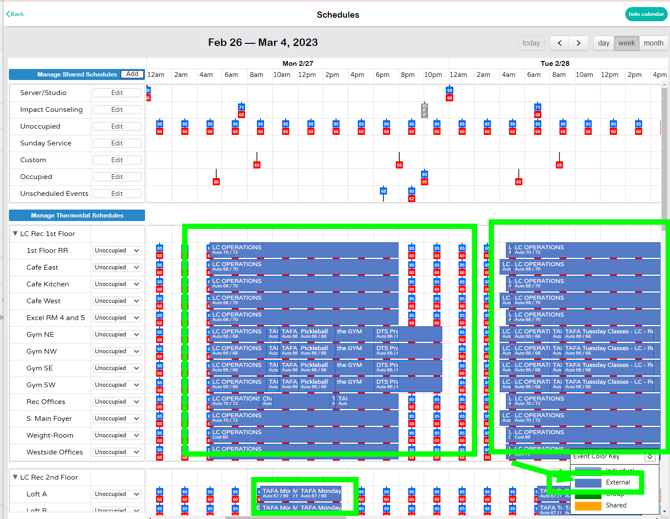
8. After waiting about 15 min, you should start to see “external” events/ schedules appear on your Pelican Schedule Dashboard from eSPACE. ALL blue/purple events are from eSPACE, so if these events appear on your Pelican Schedule Dashboard, then the integration is working.
- All events from eSPACE (sent through the API) will be in the blue/purple color, which is labled external in the Pelican color key.
- Because the integration pushes every 15 min, eSPACE only sends the next few days of events/occurrences.
These schedules are in addition to the schedules that are created in Pelican. This way you can still schedule basic office hours or school hours in Pelican and use eSPACE to schedule for special events.
Unoccupied Temperatures
Since eSPACE only pushes schedules with occupied temperatures, make sure to set up a Shared Schedule on your Pelican Dashboard with unoccupied temperatures throughout the day and assign all thermostats to that Shared Schedule. This way if there are no events coming from eSPACE and someone comes into the space and bumps the cooling down or heating up, then their "hold" will only last until the next Shared Schedule unoccupied time. The thermostats will ONLY follow the schedule and temperatures from eSPACE during the event from eSPACE. Once the event is over, the thermostats will revert to the programming inside your Pelican site (this applies to the fan mode, thermostat mode, temperatures..).
Giving Others access to FACILITeSPACE
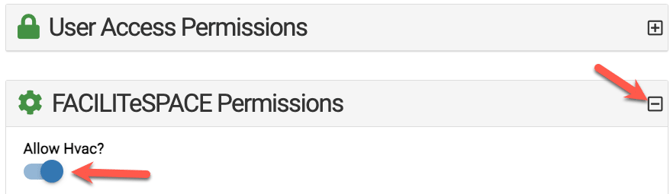
9. In order to give others access to more than just the dashboard in FACIITeSPACE, they must first be an admin in Event Scheduler. Without being an admin, they will not have access to the actual integration under Integrations in the left side menu bar. Then you can go to FACILITeSPACE click on Settings > Users > select a user, expand FACILITeSPACE Permissions and check to "Allow HVAC" and Save.
10. This will not only allow them to see and access the settings in FACILITESPACE (such as the Pelican section), it will also allow them to set an HVAC override on events in Event Scheduler, learn more below.


Overriding HVAC at the Event or Occurrence Level
11. For every admin that you give access to FACILITeSPACE, they will then be able to see an additional section on the main Details tab of each event, that will allow them to create an override for the HVAC for that specific event. In that section, they can also override the HVAC off for an event if they want to. (Any ramp time that is added to the thermostats in FACILITeSPACE will turn the air on "X" minutes before the HVAC override on the main Details tab of an event). 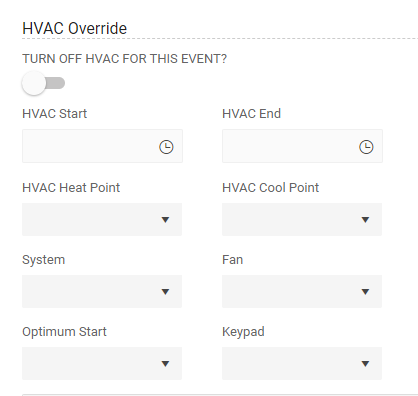
-
- Admins can also go to Event Scheduler > Settings > Basic > Users and edit ANY user's permissions to allow them to set overrides for the HVAC for their events in Event Scheduler. However, they will not ahve access to the integration in FACILITeSPACE unless they are an admin in Event Scheduler.
-
- Once allowed, those users will see a section on the main Details tab of their events where they can set a specific time that they want the HVAC to turn on and off.
-
- If an admin needs to override HVAC for one occurrence and not the whole event, click on the Occurrences tab of the event, expand the occurrence that needs editing, click Edit Date/Time and then adjust the HVAC for that one occurrence as needed.
Creating Overrides on the FACILITeSPACE Dashboard
12. An admin (or regular user or sub-admins) with access to FACILITeSPACE can also click “Edit HVAC” on any event in order to create a last minute HVAC override for any upcoming events.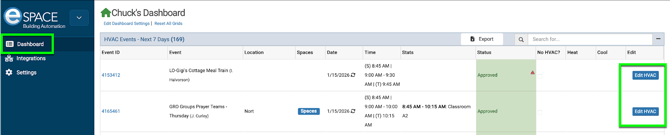
13. If you see a red triangle icon on an event in the “Status” column on the FACILITeSPACE Dashboard, then it’s warning you that no spaces on that event have been assigned to a thermostat, therefore no HVAC schedule will be sent to Pelican for that event.

eSPACE can integrate with the following Pelican thermostats:
-
Old Pelican Thermostats:
-
TS1 = temperature
-
TS2 = temperature and humidity
-
TS3 = temperature and CO2
-
TS4 = temperature, humidity, and CO2
-
-
New Pelican Thermostats
-
TC1 = temperature
-
TC2 = temperature and humidity
-
TC3 = temperature and CO2
-
TC4 = temperature, humidity, and CO2
-
https://www.pelicanwireless.com/tc-thermostat/
For any questions about this integration or troubleshooting schedules, please email support@espace.cool
For any questions about the thermostats themselves, connectivity, or programming thermostats based on equipment needs, please email support@pelicanwireless.com.