The Pre-Approval layer of approval is a way to add an EXTRA layer to the regular approval process for all events in your eSPACE. This approval is done by a designated Admin(s) and/or Sub-Admin(s) that have access to do so under their user permissions BEFORE the event goes through the regular layer of approval (Requires Administrative or Sub-admin Approval grid on the Dashboard). This is a great option for organizations that need a person to "preview" the event requests first before sending them to the regular layer of approval.
Basics of How Pre-Approval Works
- However, it only takes one person to pre-approve the event in order for the entire event to be pre-approved.
- A. You can only parse out pre-approvals by locations (as found under Settings/Basic/Locations). If an admin and/or sub-admin has been given the ability to pre-approve events they will only be able to pre-approve events for the locations they have access to under their user permissions. If you parse out pre-approval by locations in your account, make sure there is at least 1 person who can pre-approve for each location. B. In addition you can also parse out pre-approvals by event categories. Keep in mind that each event category will need be assigned to at least one person to pre-approve it, you can not set up to pre-approve just apply to some of your event categories.
- If you need to parse out approval for different items (spaces, resources, services) on an event, that is done at the regular layer of approval usually with sub-admins: Approval Areas | Parsing Out Items for Sub-admin Approval
- If you need to parse out approvals for items on events with admins, read this knowledge Base article: Where Does an Admin with Sub-Admin Role Approve their Area of Responsibility in an Event?
- A separate setting will force all edited events to be pre-approved again if enabled, read more below.
To get started, go to Settings > Advanced > General > Event Creation to enable the Pre-Approval process by selecting the toggle button, as shown below. (optional). When selected, the submitted event will show pending “pre-approval”.
When selected and BEFORE all Sub-Admins and Admins approve their areas of responsibility for an event, the sub-admin or admin can Pre-Approve or decline the event, based on their location permissions.

Once a user submits an event for approval and your account has pre-approval enabled, then the user that submitted the event will see the event in their "Pending Approval" grid with the tag "Awaiting Pre-Approval". Once the event has been pre-approved AND gone through the regular layer of approval, then the event will move to their "Approved Events" grid on their Dashboard.

Require ALL Changes to Be Re-Pre-Approved
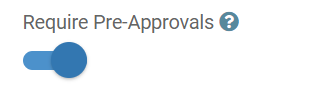
In addition, once an event has been approved by the Pre-approver and has gone through the normal workflow, sometimes changes/updates/cancelations can be made to the event by the owner/editor of the event or Admin. If you'd like ALL changed/updated/canceled events to go back through the pre-approval process, you should toggle the selection shown below to activate this option.

- To further clarify, if any edit is made to the Details tab, Contacts tab, Items tab... with this setting enabled that event will need to be pre-approved again if changes are made.
By Event Category
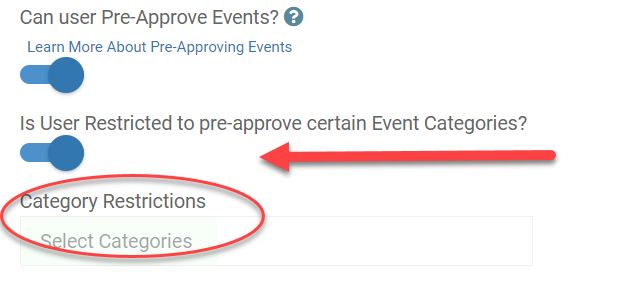
In addition, you can restrict the user to pre-approval permissions based on specific event categories as shown below. When doing this, make sure that at least 1 admin or sub-admin is set up to pre-approve every event category.
- Read more in this article: Pre-Approval Option: Parsing Pre-Approval Permissions by Event Categories