Related Articles:
When creating an event (private or public), you can choose to make it virtual and enter a Zoom or Teams etc link
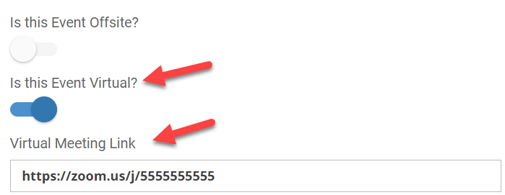
On the Details tab of the event, you can choose to make the event a Virtual event. Once you do, you'll be prompted to add the Virtual Meeting Link; however, it is not required. You can create a Zoom link in your Zoom account or Microsoft Team etc and then paste that link into the "Virtual Meeting Link" field on the Details tab of the event in eSPACE.
- Keep in mind that if you use a link you must enter the link with the correct format (must start with "http://" or "https://") or the following warning will appear:
Marking an event as virtual will cause the following to happen:
- All users will be able to filter events by "virtual" on the internal calendar views.
- All users will be able to filter for "virtual" events in reports.
- No space, resource, or service will be required on the event.
Once the event is submitted and approved, it will also appear on the Dashboard and internal Calendar views with a tag that says "Virtual". You can also filter events on the internal calendar view by "Virtual".
![]()


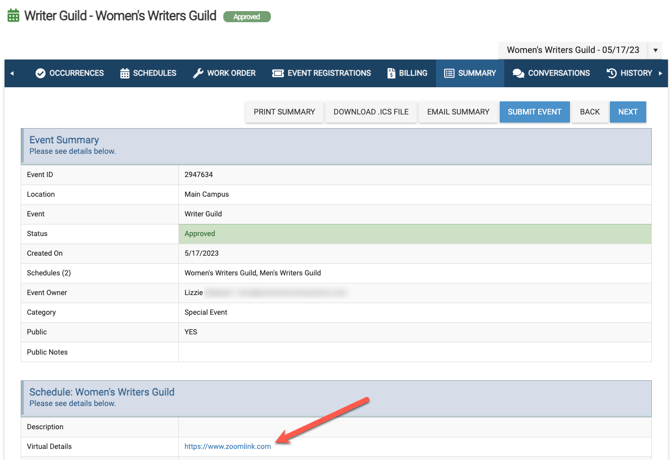
To connect to your Virtual Event right from eSPACE simply click on the Event Name, then click on the Summary Tab and the link will appear as a clickable hyperlink.
TIPS:
- It's a good idea to change the name to include the word "Virtual" in the name (e.g. Men's Bible Study would change to Men's Bible Study-VIRTUAL).
- It might be helpful to create an Event Category called Virtual to help you with reporting and filtering.
-
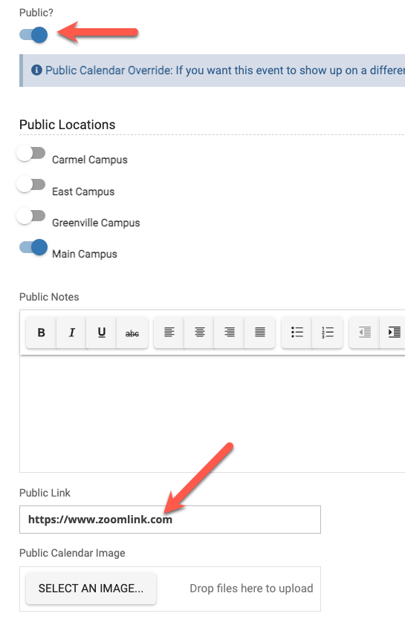
Additionally, you can select Public and enter your online meeting link into the Public Link field to have it appear on your Public Calendar as a clickable hyperlink.
- Related article: Public Calendar Feature: Embed Your eSPACE Calendar on your Website.