Sections in this article:
- How Configurations Work
- Create a Configuration
- View and Edit Configurations
- Add Configurations to a Space or Resource
- Set a Default Configuration
- Set Max Capacity
- Choosing a Configuration on an Event
- Event Setup Report
How Configurations Work
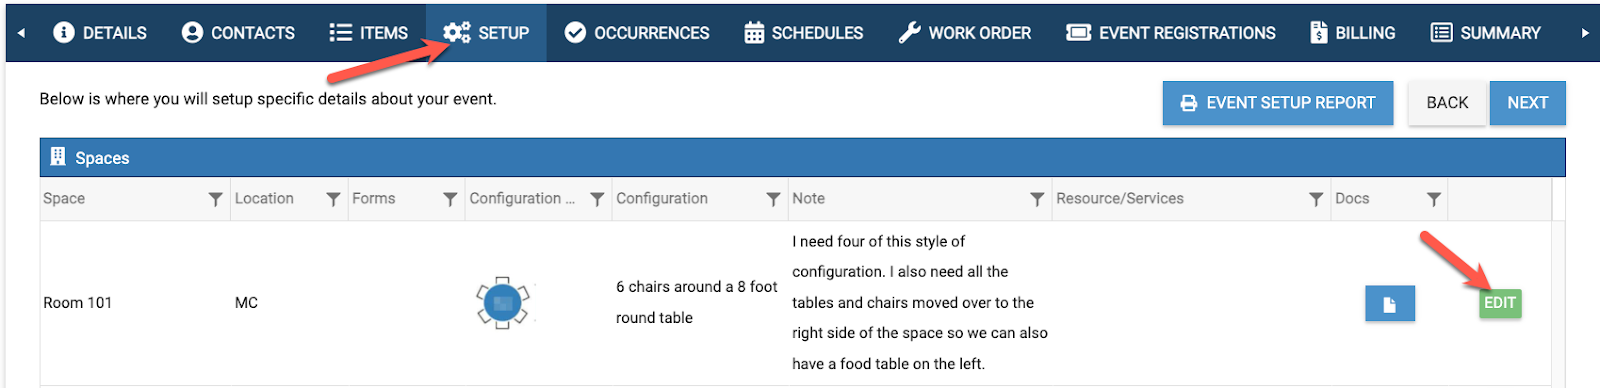
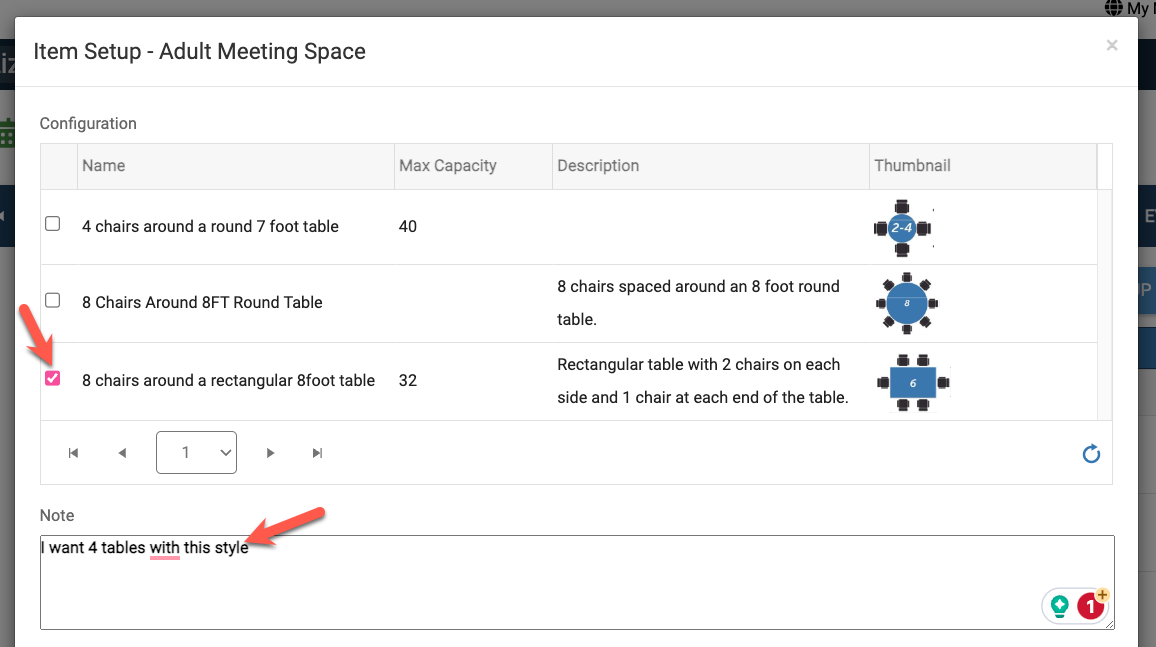
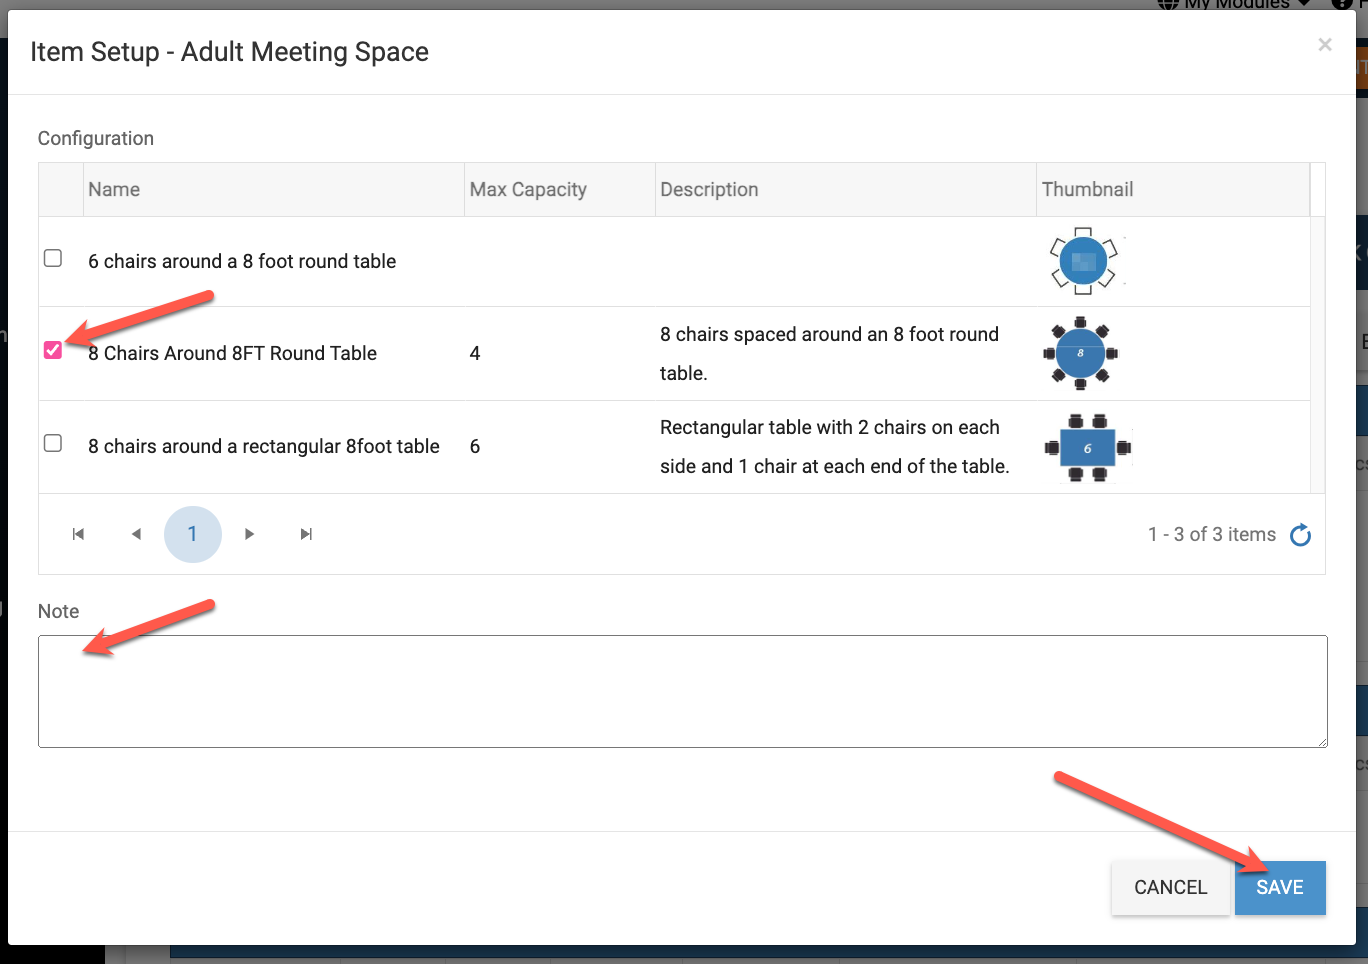
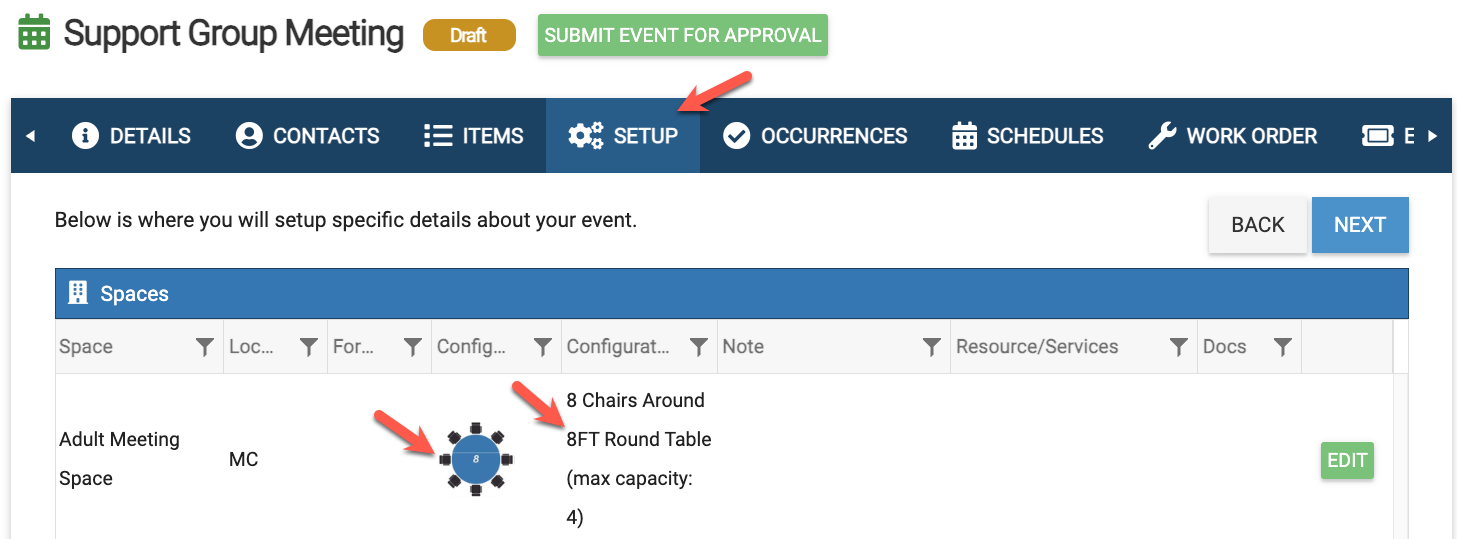
A configuration is a standard setup for a room, like "8 chairs around a round table" or "theater style." When someone books a space or resource, they open it on the Setup tab of their event and pick the configuration they want. They can also add notes, like how many tables they need.
Only admins can create and manage configurations. Everyone can choose them on their events.
With configurations you can:
- Create as many as you need, each with photos or diagrams.
- Assign one configuration to many spaces at once.
- Set a default for each space, and a max capacity for each configuration.
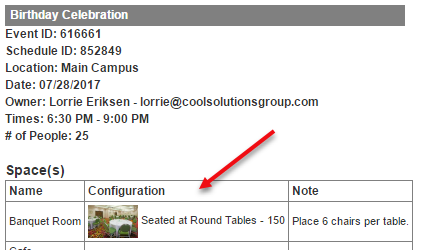
- Show the setup photo on the Event Setup report for your facilities team.
Create a Configuration
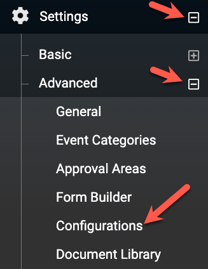
- Go to Settings > Advanced > Configurations.
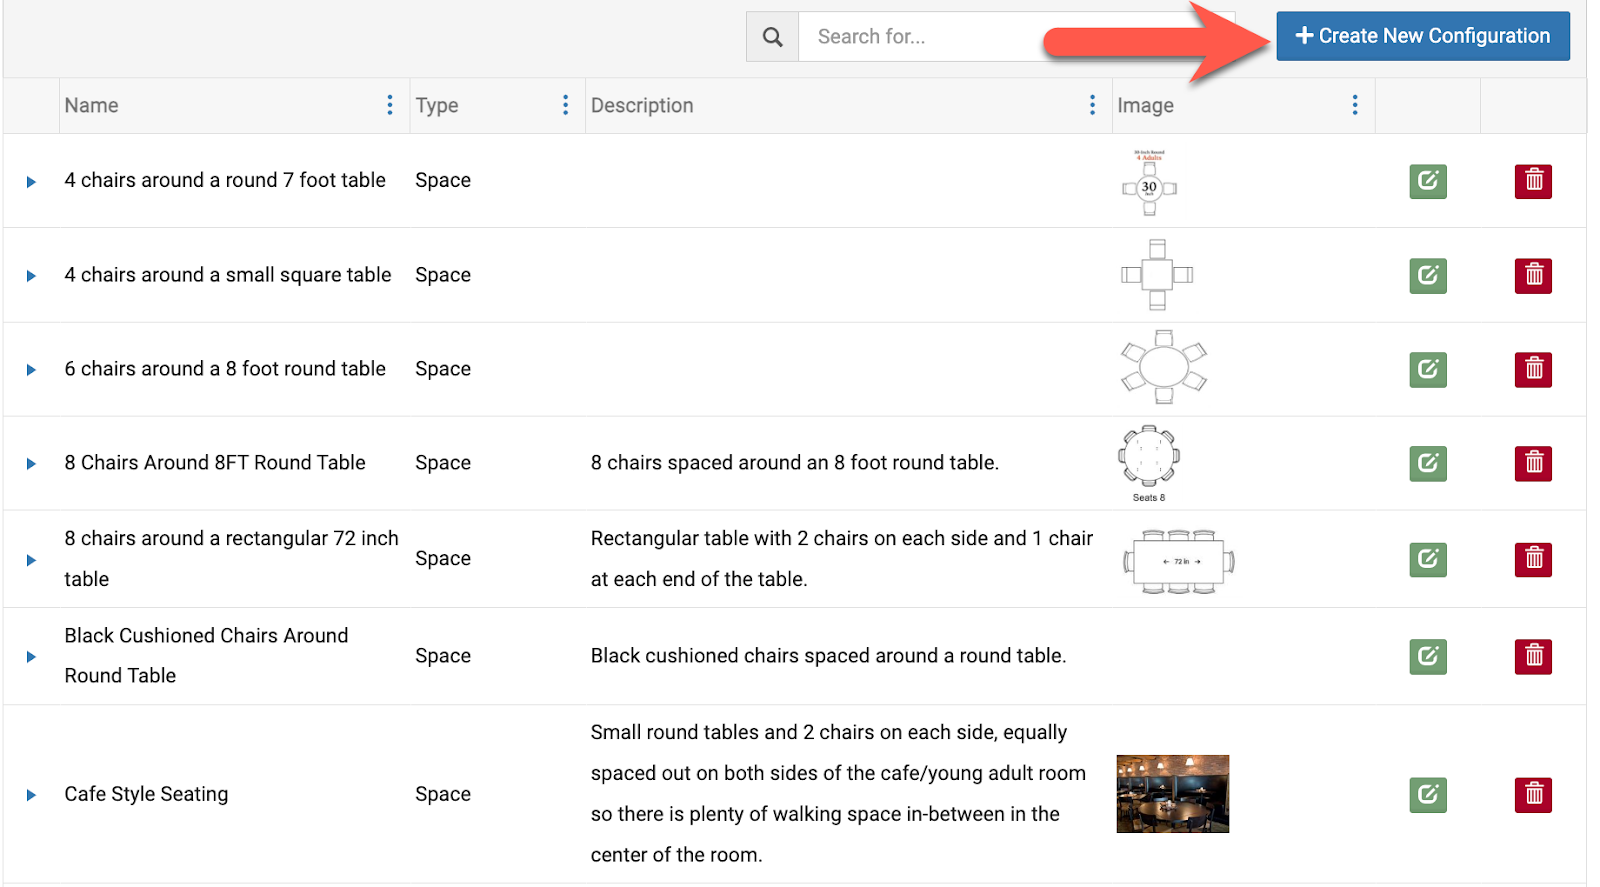
- Click Create New Configuration.
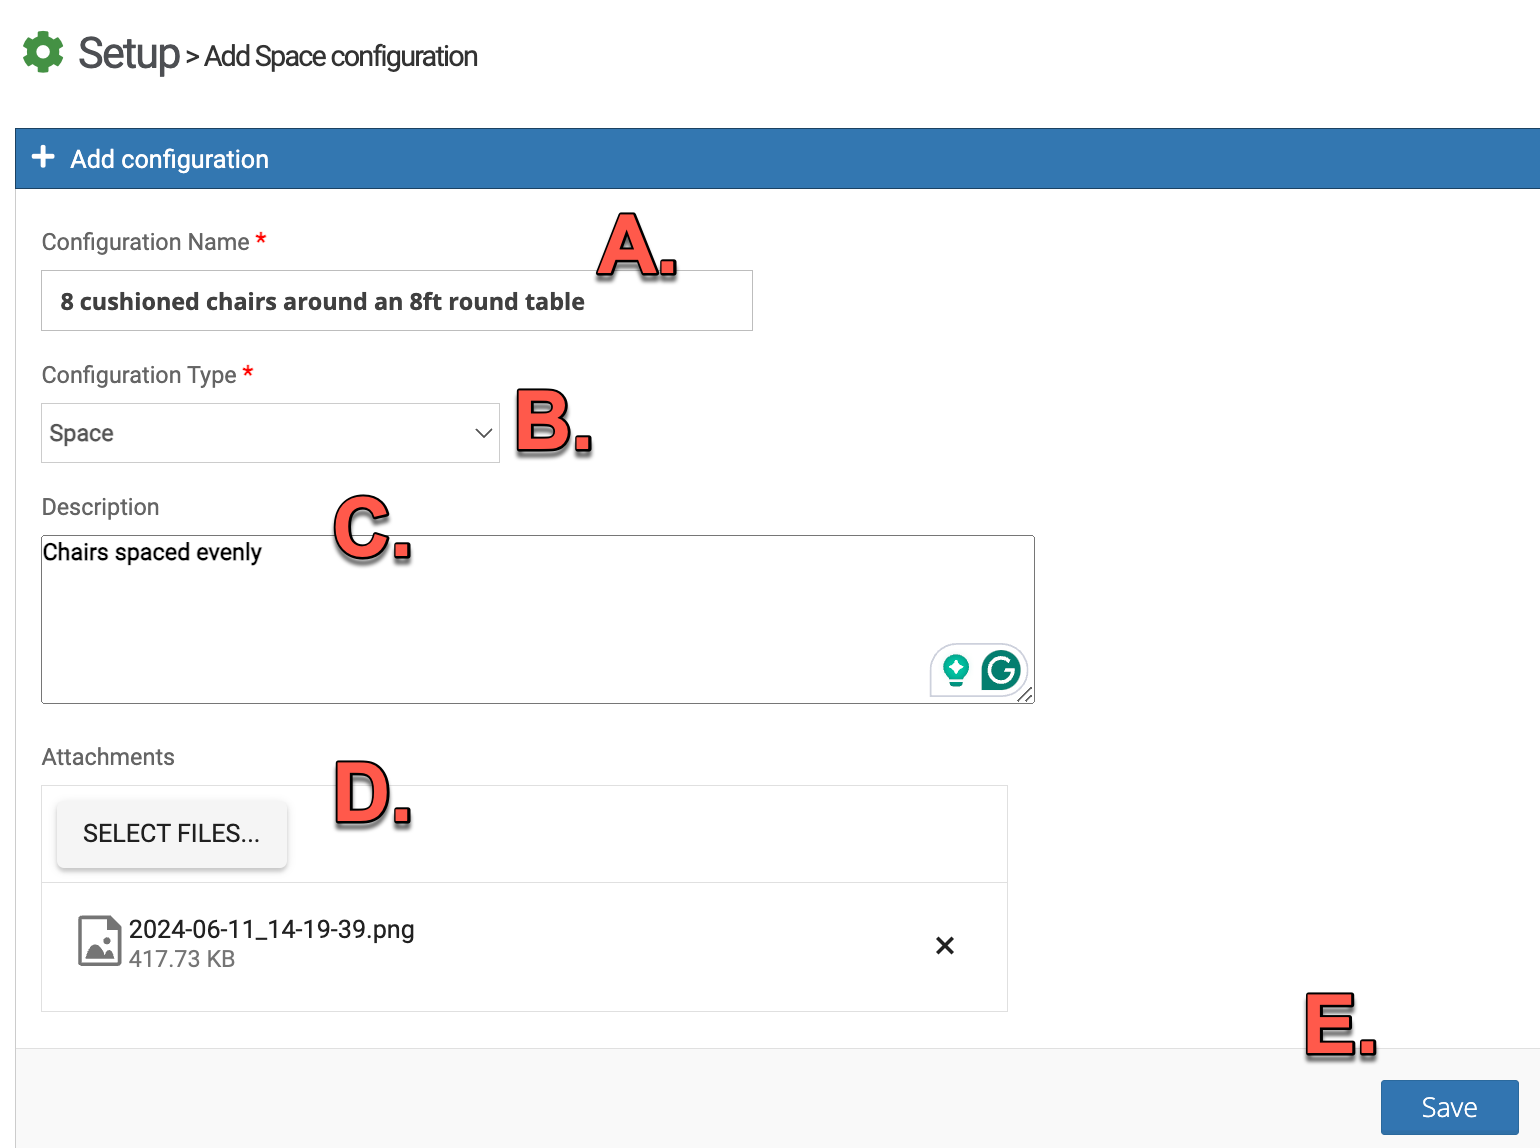
- Fill in the form:
- A. Name: a clear description, like "8 cushioned chairs around an 8 ft round table."
- B. Configuration Type: choose Space to use it with spaces.
- C. Description (optional).
- D. Image: upload a photo or diagram of the setup (.jpg, .jpeg, .gif or .png, under 232 KB).
- E. Click Save.
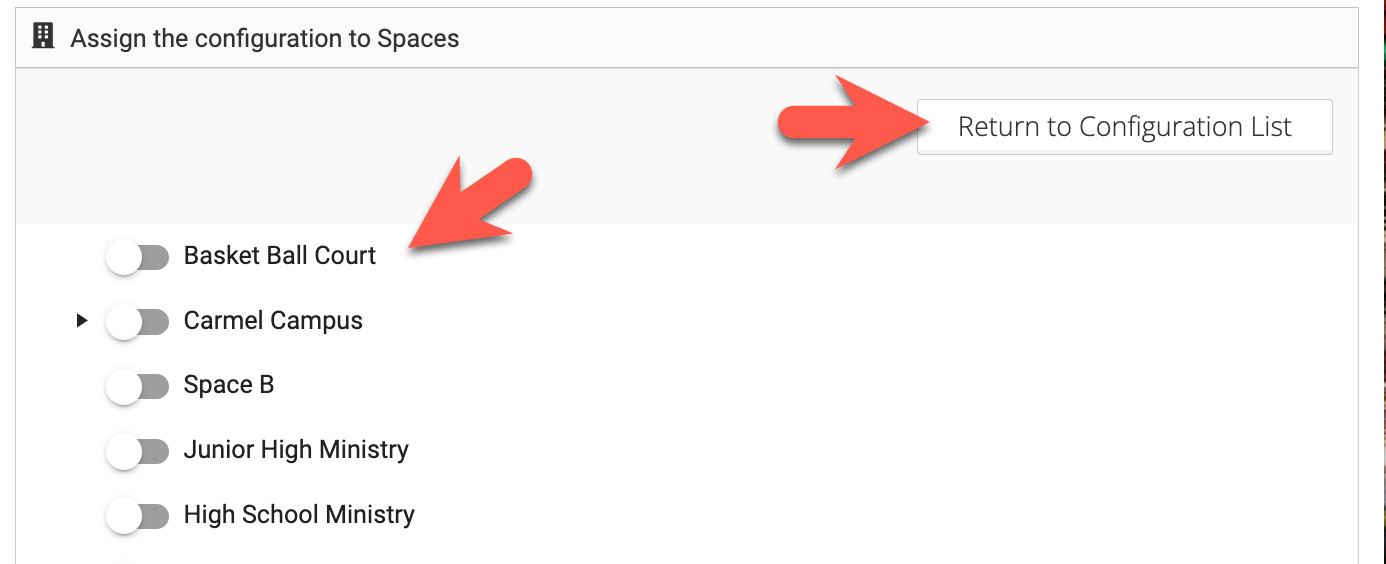
- Turn on every space that should offer this configuration, then click Return to Configuration List to save.
View and Edit Configurations
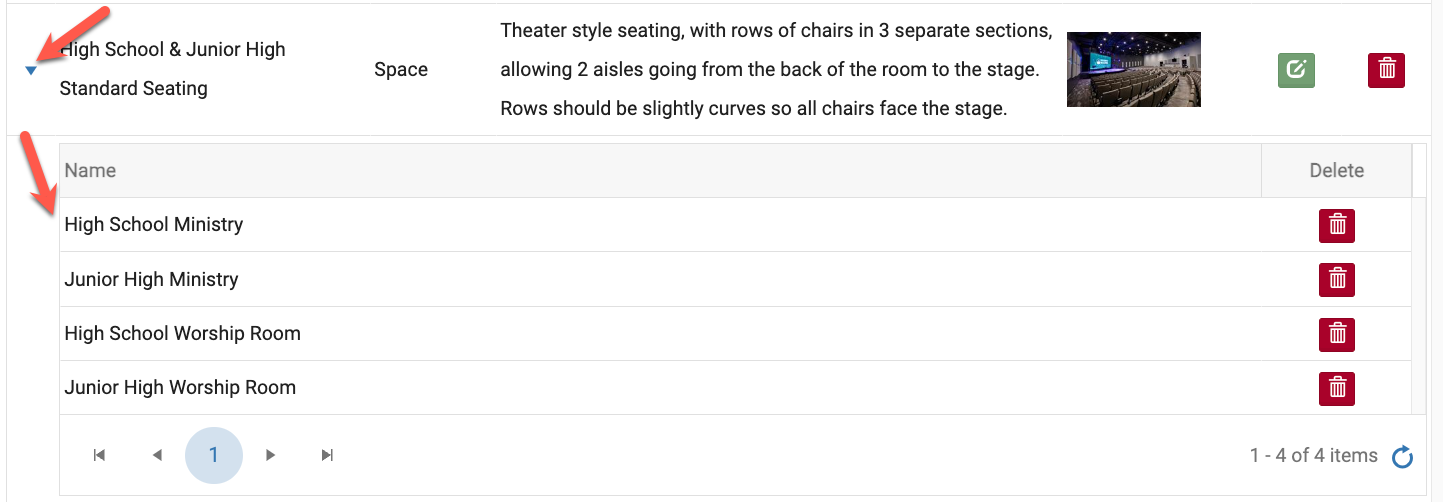
The Configurations page lists every configuration in your account. Click the arrow next to one to see which spaces use it.
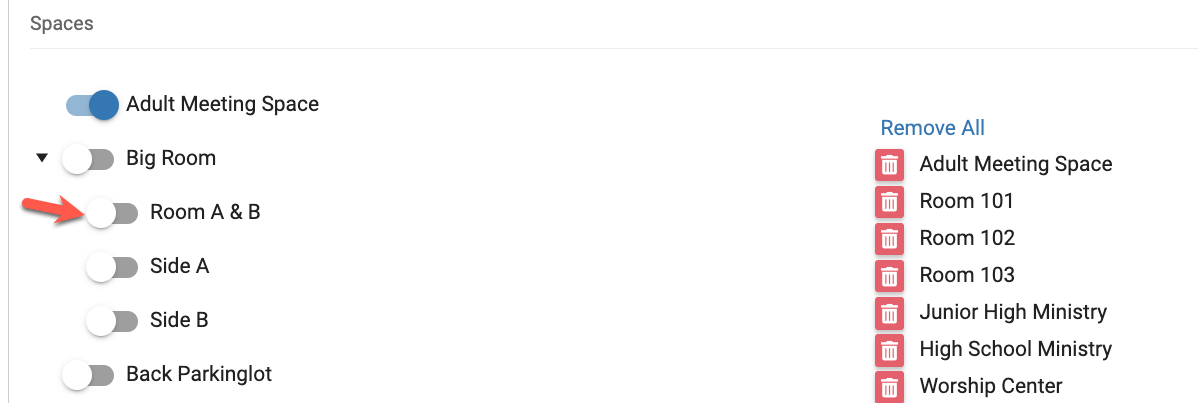
Click the green edit button to rename it, add spaces or add images.

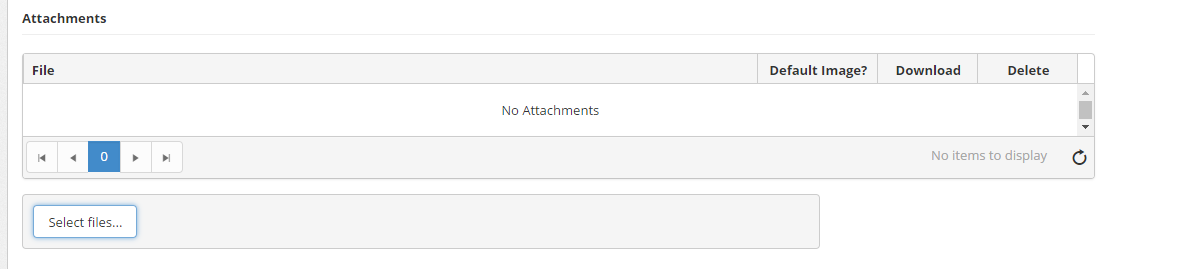
To add images, click Select files under Attachments. If you add more than one, choose a default image for the thumbnail. Publisher (.pub) files won't work.
Add Configurations to a Space or Resource
You can also add configurations from the space or resource itself:
- Go to Settings > Basic > Spaces (or Resources), hover over the item, click the three dots and choose Edit.
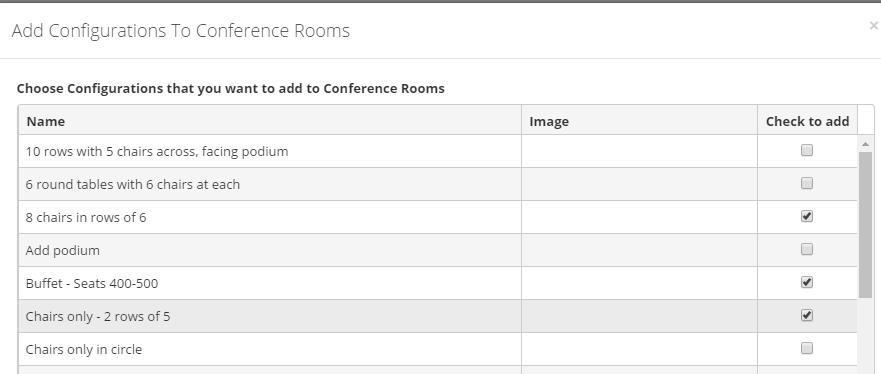
- Expand Allowed Configurations and click Add Configurations.

- Check every configuration you want and click Save.
Set a Default Configuration
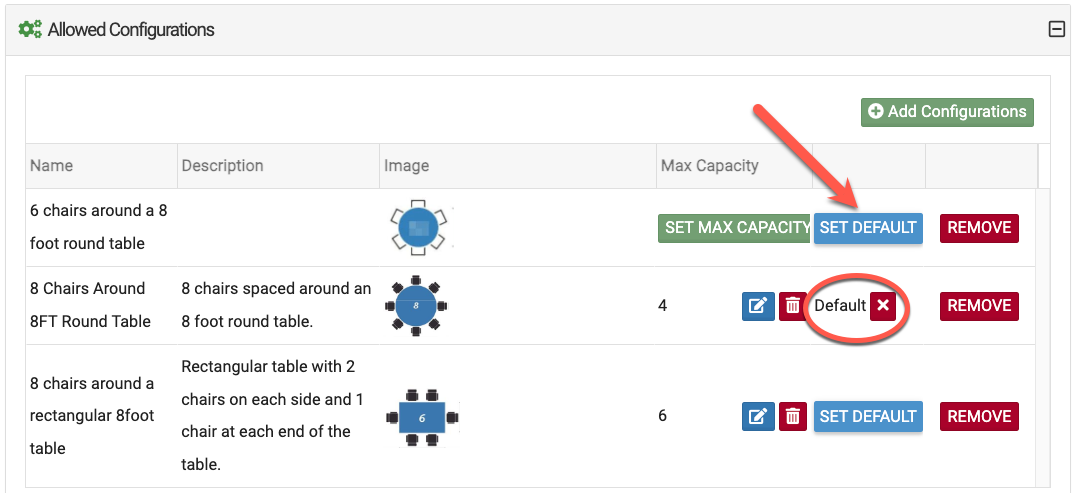
In a space's Allowed Configurations, click Set Default next to one configuration and click Save. When someone adds that space to an event, the default shows on the Setup tab automatically.
Set Max Capacity
In a space's Allowed Configurations, click Set Max Capacity to enter how many people fit in that space with that setup. People will see the capacity when they choose a configuration. If you set capacities here, you can leave Max Capacity blank on the space itself.
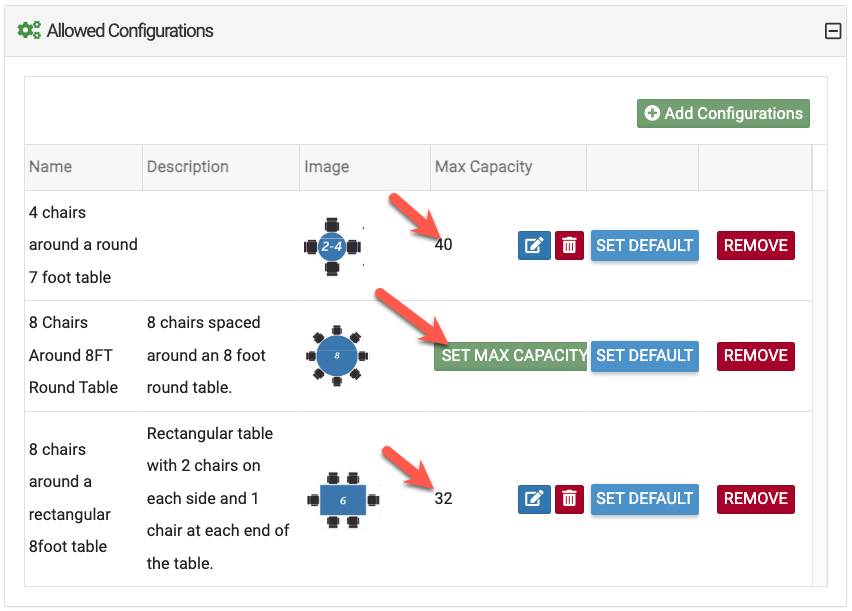
For example, if an event needs to seat 32 people, someone could pick "8 chairs around a rectangular 8-foot table" and add a note that they need 4 of them.
Choosing a Configuration on an Event
Anyone booking a space or resource can pick a configuration:
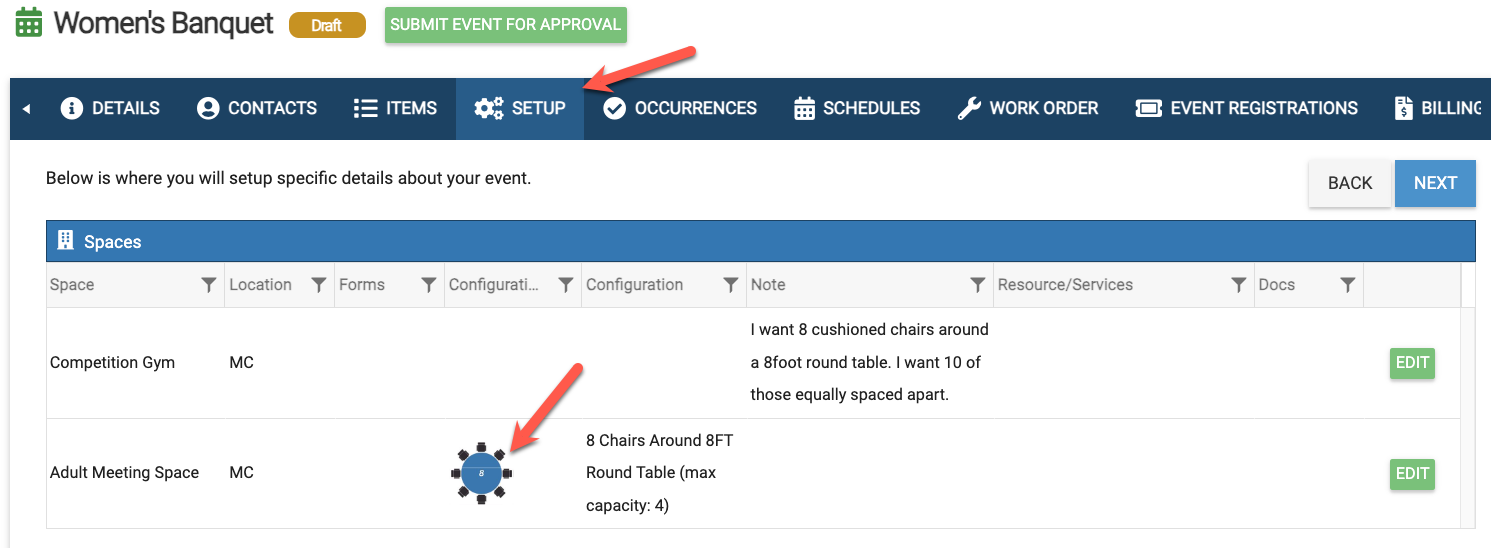
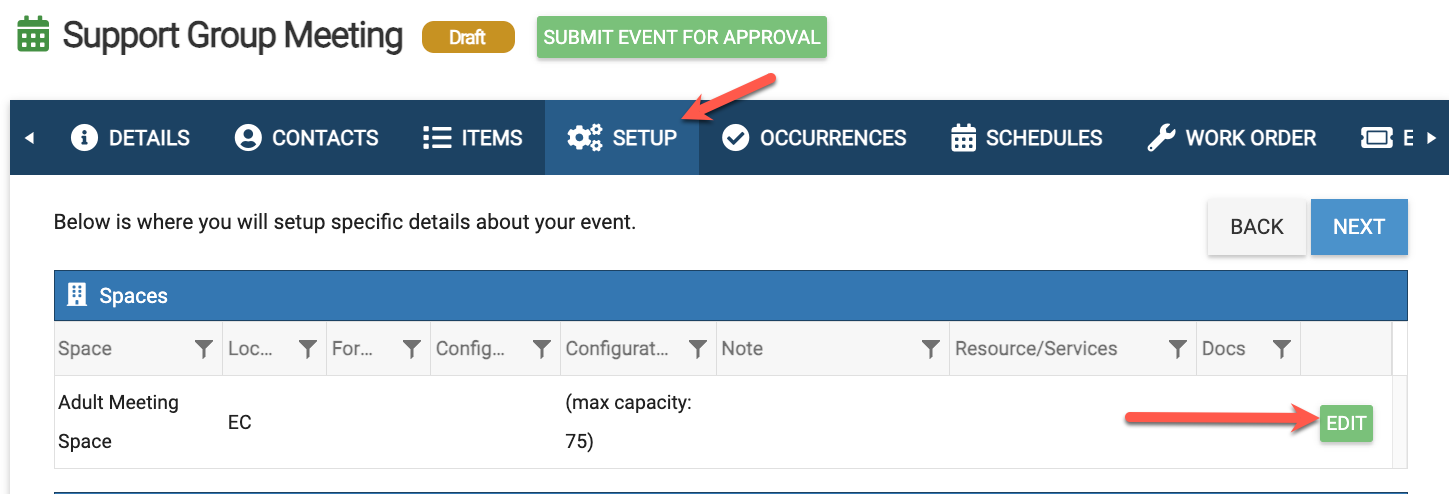
- On the event's Setup tab, click the green Edit button next to the space or resource.
- Choose a configuration, add a note if needed and click Save.
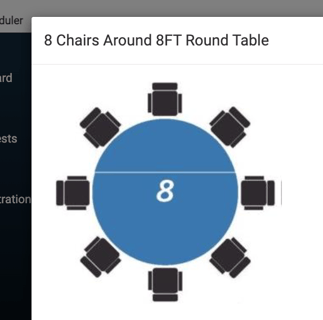
- The configuration (and its image, if it has one) now shows on the Setup tab. Click the image to see it larger.
Event Setup Report
To include configuration images on the Event Setup report for your facilities team, turn on Show Attachments before you run the report. Learn more: Event Setup Report (Facilities Setup Report)